I love this time of the year. When autumn approaches, I try my best to summon it into full force. Wearing a great pair of riding boots, dark lipsticks and sexy dark nail polishes are a great way to embrace the season, but you know what's just as good? Why, roasted root vegetables!
This dish was created in celebration of the "cold front" (seriously laughable to all of my fellow Michiganians) that came through this past weekend. I thought the ever-so-southern staple, grits, would be a perfect accompaniment. This is a great meal and will satisfy vegetarians and omnivores alike. Use this recipe, like most, as a method. Cooking is about making food that tastes good (and good for you, most of the time) while allowing one's creative freedom. Use what you like and limit those that you're too fond of. I hope you enjoy!
Serves 4
INGREDIENTS
- 5 medium carrots, peeled and chopped into 1/2" pieces
- 3 sweet potatoes/yams, peeled and chopped into 1/2" pieces
(other yummy alternatives: russet potatoes, rutabagas, parsnips, pearl/red onions)
- Olive oil
- 3 tsp dried oregano
- One bunch of swiss chard, chopped
(other yummy alternatives: spinach, kale)
- Quick-cooking grits, (cooked according to the label)
- 1/2 cup medium/sharp cheddar cheese, grated
(other yummy alternatives: gruyere, parmeggiano reggiano)
- A splash of heavy cream (optional)
- Handful of parsley, finely chopped
- Your choice of protein (for the omnivores)
- Kosher salt
- Freshly ground black pepper
DIRECTIONS
Preheat oven to 425º.
Chop the sweet potatoes and carrots into 1/2" pieces. The veggies will shrink when they roast, so don't get too knife happy.
Line two sheet pans with aluminum foil for the sake of clean-up (my husband is always overjoyed to wash one less dish). Season veggies with olive oil, salt, pepper and oregano. Toss ingredients together and spread into one even layer (clean hands are the best tool). Tip: the veggies will not caramelize if they're stacked on top of each other.
Place veggies in the oven and roast for 40 minutes. Halfway through, rotate the pans and give them a vigorous shake.
While the veggies roast, bring a pot of water to a boil for the grits (per the label's directions).
To prepare the swiss chard, cut off the rough ends. Stack the leaves and roll it like a cigar (or something else... ahem!). Begin to chop into 1" pieces and voila! The knife skill that you just did is called a chiffonade (pronounced shif-ah-nod). Wash and dry the greens to remove sand and dirt. Repeat if needed. A salad spinner simplifies this task.
Wash and (spin) dry the flat leaf parsley in the same manner.
Grate the cheese...
... and measure out the grits. I acknowledge that quick-cooking grits is blasphemous to a born and raised Southerner. I used this variety because it will cook in the same amount of time as the swiss chard and protein. Feel free to substitute with "real" grits if your heart desires.
"No self-respecting Southerner uses instant grits. I take pride in my grits."
- Mr. Tipton from My Cousin Vinny.
In a large non-stick pan, warmed over medium/high heat, saute the onions.
Add the swiss chard and cook them until it looks like...
... this. Remove from heat and set aside.
When the water comes to a boil, season with kosher salt and add the grits, stirring constantly.
Add the cheese and heavy cream. Cover and remove from the heat. This would be a great time to start cooking your protein, if you so choose to serve and/or consume it.
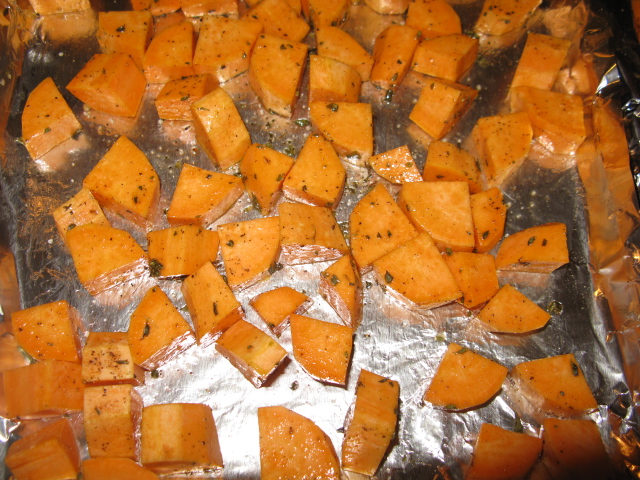
This is what your veggies should look like after they're done roasting.
PLATING
You don't need to be a professional chef to plate like one. Since we eat with our eyes first, you deserve to be presented with beautiful food. I like to center then stack my ingredients.
Start off with a "pool" of grits as your base.
Pile the sauteed swiss chard, leaving some space along the perimeter.
Top with the roasted vegetables and garnish with the flat leaf parsley. Vegetarians, rejoice!
This is what it looks like served with chicken.