Thursday, December 27, 2012

Grilled Vegetables and Bean Quesadillas

Tex-Mex.  Mexican.  Taco Bell.  Whatever you may call it, Mexican or Mexican-inspired food is quite the rage.  In Houston, you can't swing a dead cat by its tail without hitting a Mexican or Tex-Mex restaurant.  What I find infuriating about most of them is that their quesadillas are less than desirable.  They're flavorless and doused in grease.  BLEH!!!!!  I know that I can build a better quesadillas than that!

If you haven't read my other blogs, this recipe will be easy.  Too easy.  In the words of Sandra Lee from the FoodNetwork, "it's semi-homemade."  If you're feeling overly ambitious, you can make your own re-fried beans and tortillas (hats off to the latter half!).  Though I would love to partake in those activities, I just settle on the ones I can get from the grocery store.  Don't judge me - I'm a busy lady!

I don't like my quesadillas spicy, but I'm sure they would be tasty with some fresh jalapeños.  :)

Serves 2 or 4 less hungry people

INGREDIENTS

-  Two flour tortillas
-  2-3 large spoonfuls of refried beans
-  Your choice of cheese.  I like the "Authentic Mexican" Kroger brand
-  2 small zucchinis, julienned
-  Half a red onion, sliced
-  1/4 cup of fresh cilantro
-  Olive oil
-  Kosher salt and freshly ground black pepper
-  Salsa of your choice

DIRECTIONS

Heat a large pan over medium-high heat with olive oil.


Add the julienned zucchini and sliced onions to the pan and season with a little salt and pepper.  Sauté until golden brown.  Remove from heat and transfer to a clean vessel.  Wipe the pan clean.


Spread a spoonful or two of refried beans onto one side of a tortilla.  Top some of the zucchini and onion mixture, cheese and fresh cilantro.  Repeat with the remaining tortilla.  Note:  Do not over fill your quesadilla or it won't fold nicely.  Less is more.


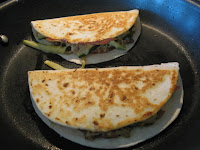
Fold the tortilla in half and place it a dry pan over medium heat.  The tortillas will remain folded once the cheese melts, so you may have to babysit them a little.  Flip them over once the other side is toasty and golden brown.  Remove from the heat, slice in half and serve with your favorite salsa (store-bought or homemade).  


Tuesday, December 25, 2012

Paninis and a Berry Colorful Salad


Do not fret everyone, I am alive.

I know that I've been negligent on posting but I promise that it's been worth it.  Heading into the new year, most people make goals to eat well, exercise and to be more healthy.  3-4 weeks later, those resolutions fall by the waist-side and people are going about their merry way, following their old habits.

These two recipes are so easy, healthy and not to mention, delicious.   They'll also help you keep on track of your goals.  You'll want to make these all the time, experimenting with different ingredients.

These dishes can be easily altered to fit your dietary preferences.  I happened to make the salad from what I had laying around the kitchen, so feel free to substitute any of the ingredients that fit your taste.

Last note, I realize that paninis are typically pressed, but "grilled sandwiches" don't give off a festive flare.

SERVING SIZE:  2

SAUTEED  MUSHROOM PANINIS

INGREDIENTS

-  4 slices of sourdough bread (other yummy alternatives: french or italian)
-  One carton of baby bella mushrooms, halved  (other yummy alternatives: sliced cooked meat of your choice, white button mushrooms, cremini mushrooms)
-  4 tbsp sun-dried tomatoes in olive oil, julienned
-  2 cups sweet pea sprouts (other yummy alternatives: baby spinach, butter lettuce, chopped endive, romaine lettuce)
-  2 thin slices of Jarlsberg cheese (other yummy alternatives:  swiss or muenster)
-  Olive oil for grilling
-  Red wine vinegar
-  Extra virgin olive oil
-  Kosher salt and freshly ground black pepper

DIRECTIONS

Heat a large non-stick pan over medium heat with a couple teaspoons of olive oil.

Add mushrooms and slowly sauté until they have cooked down, about 15-20 minutes.  Transfer the cooked mushrooms to a clean dish and wipe the pan clean.  If you are using meat, you may omit this step if you're using leftovers or deli meat.

Return the pan over medium-low heat (unless you like burnt bread).  Oil one side of the bread and place that side down onto the pan. 

Pile half of the mushrooms (or meat) onto the bread, two tablespoons of the sun-dried tomatoes and one slice of cheese.  Top with another slice of bread and oil the top.

Repeat these steps with the other sandwich.  Flip the sandwiches when they turn a little past golden brown and wait for the other side to get the same color.  Transfer to a wire rack (trick:  this prevents the other side of the sandwich from getting soggy).

While the sandwiches are cooling, rinse and spin dry the sweet pea sprouts.  Place them in a bowl and lightly dress it with extra virgin olive oil, red wine vinegar, salt and pepper to taste.  Toss well.  Season further, if needed.

Take a handful of greens and place them in the sandwich - it's okay if there's too much.  :)  Cut the sandwich in half and devour your creation.


SERVING SIZE:  4 or 2 really hungry people

A BERRY COLORFUL SALAD 
(corny name, I know)

INGREDIENTS

-  Two cartons of blackberries (other yummy alternatives:  any berry you wish!)
-  One cup grape tomatoes, halved (other yummy alternatives:  any fresh tomato would suffice)
-  2 cups fresh basil, roughly chopped
-  One grapefruit, peeled and segmented/supremed
-  2 tbsp extra virgin olive oil
-  Kosher salt and freshly ground black pepper

DIRECTIONS

Wash and dry the first three ingredients.  Chop all ingredients as noted above.

Toss the fruit and herbs into a bowl and toss with extra virgin olive oil.  Salt and pepper to taste.


Sunday, September 16, 2012

Berry Jam Vinaigrette

Salad dressing is easy to make and is a wonderful way to exercise your creativity.  I came up with this recipe after purchasing some locally made jam in the Texas Hill Country.  All you need to remember is that it's always a 1:2 ratio; one part acid to two parts oil.  Adjust the sweetness or tartness to your taste.  I promise that this dressing will take your salad to a whole new level.

3 of 3 dishes from my Late Summer Supper Spectacular

Serving size: for 2 large entree salads or 4 side salads

INGREDIENTS
- 1 tbsp natural blackberry jam, seedless
(other yummy alternatives: raspberry, mixed berry, strawberry, grape)
- 1 1/2 tbsp balsamic vinegar
(other yummy alternatives: red wine vinegar, white balsamic vinegar, lemon juice)
- 1 tsp dried oregano
- 5 tbsp extra virgin olive oil
(other yummy alternatives: grapeseed oil, walnut oil)
- Kosher salt
- Freshly ground black pepper

DIRECTIONS


Whisk the jam, balsamic vinegar and dried oregano in a bowl.  Season with salt and pepper and taste.  Adjust seasoning to your preference.


Toss your choice of greens with the dressing.  Yum. <3


Saturday, September 15, 2012

Tomato and Basil Bruschetta

Whether it's pronounced "brews-keh-tah" or "brew-shet-tah," this recipe is simple and delicious.  It's basically toasted bread with a fantastic raw salad.  You can easily make this vegan by solely using olive oil to brown the bread.  Keep this one simple and leave the fancy techniques for another occasion.

If you've seen "Julie & Julia," this dish was inspired by one of the scenes.  Julie makes this dish right before deciding to start a blog.  

2 of 3 dishes from my Late Summer Supper Spectacular

Serves 4 or 2 hungry people

INGREDIENTS
- 1/2 of an italian round bread
- Olive oil
- 2 tbsp unsalted butter
- 4 tomatoes, chopped
- 1/2 cup of yellow cherry tomatoes
(other yummy alternatives: heirloom tomatoes - if you're feeling ritzy)
- 1/3 cup English cucumber, chopped
- 1 cup fresh basil, chopped
- 1/4 cup extra virgin olive oil
- Kosher salt 
- Freshly ground black pepper

DIRECTIONS

Wash the vegetables and basil.  Chop and place in a large bowl.  Drizzle with a healthy amount of extra virgin olive oil and toss to combine.  Do not season with salt and freshly ground black pepper until you're ready to serve.


Slice the bread into 1/2-1" pieces.  Add olive oil and butter to a cast iron pan over medium/low heat.
If you're like me, you'll smell the bread first before slicing it.  I love the smell of bread!


Toast until they're golden brown on each side.


 Serve the tomato and basil salad on top of the toast.  Enjoy!


Watermelon Salad with Fried Cheese

In true Texas fashion, a storm was a-brewin' on this fine September day.  The cold front that came through last weekend teased me like an experienced burlesque dancer, reminding me that I wasn't in Kansas (Michigan actually) anymore.  Summer is still in full-force.

Since it was disgustingly humid outside, I decided to create a fantastic summer spread of salad and light entrees.  I also prepared a raspberry and strawberry tart, thanks to a recipe from The Chew.  I made it my own by making a chocolate pastry cream and topping it with homemade whipped cream.  Oh, yes, I'm a rebel!

This first salad is one of my all-time favorites.  Don't be taken aback by the fried cheese served with fruit.  I know it may not make much sense, but it's sweet and savory all in one bite.  Your taste buds will thank you.

1 of 3 dishes from my Late Summer Supper Spectacular

Serves 4

INGREDIENTS
- 6-7 slices of light Havarti cheese
(other yummy alternatives:  halloumi, mozzarella)
- 1 egg
- 1 tbsp of water
- 3/4 cup italian bread crumbs
- Half of a medium (seedless) watermelon, chopped
- One cup of fresh mint, finely chopped
- 2 limes, juiced
- 1 tbsp of olive oil

DIRECTIONS


Slice the cheese into 1/2" pieces.


Whisk the egg and water in a bowl, breadcrumbs in another.  Line a pan with parchment paper.


 Dip the cheese in the egg mixture...


... then into the breadcrumbs.  If you're feeling naughty (like me), bread those suckers twice.


Place breaded cheese onto the parchment paper and repeat with the remaining slices.  Next, put the pan in the freezer and allow to set for at least 30 minutes.  If you skip this step, the cheese will ooze uncontrollably when you pan fry them.


Now, let's get our hands on that watermelon. 


Remove the rind from the watermelon and then slice into thirds.


 Chop into bite-size pieces and place into a large bowl.


 Juice the two limes directly onto the watermelon.


Chop the mint, add to the watermelon and toss to combine.  For best results, allow it to sit at room temperature for 20 minutes for ultimate flavor potential.


In a non-stick pan, add olive oil and begin to fry the cheese slices.  Flip them over when the first side is a gorgeous shade of golden brown and the cheese begins to ooze slightly.  Cook the other side in the same manner.

Remove from the heat and sprinkle with a hint of kosher salt.


 Serve the salad in a bowl and top with two cheese slices.  You will love this dish.  <3


Link to the raspberry tart:  Clinton Kelly's Raspberry Tart


Friday, September 14, 2012

Roasted Vegetables with Cheesy Grits

I love this time of the year.  When autumn approaches, I try my best to summon it into full force.  Wearing a great pair of riding boots, dark lipsticks and sexy dark nail polishes are a great way to embrace the season, but you know what's just as good?  Why, roasted root vegetables!

This dish was created in celebration of the "cold front" (seriously laughable to all of my fellow Michiganians) that came through this past weekend.  I thought the ever-so-southern staple, grits, would be a perfect accompaniment.  This is a great meal and will satisfy vegetarians and omnivores alike.  Use this recipe, like most, as a method.  Cooking is about making food that tastes good (and good for you, most of the time) while allowing one's creative freedom.  Use what you like and limit those that you're too fond of.  I hope you enjoy!

Serves 4

INGREDIENTS
- 5 medium carrots, peeled and chopped into 1/2" pieces
- 3 sweet potatoes/yams, peeled and chopped into 1/2" pieces
(other yummy alternatives:  russet potatoes, rutabagas, parsnips, pearl/red onions)
- Olive oil
- 3 tsp dried oregano
- One bunch of swiss chard, chopped
(other yummy alternatives:  spinach, kale)
- Quick-cooking grits, (cooked according to the label)
- 1/2 cup medium/sharp cheddar cheese, grated
(other yummy alternatives:  gruyere, parmeggiano reggiano)
- A splash of heavy cream (optional)
- Handful of parsley, finely chopped
- Your choice of protein (for the omnivores)
- Kosher salt
- Freshly ground black pepper

DIRECTIONS

Preheat oven to 425º.


Chop the sweet potatoes and carrots into 1/2" pieces.  The veggies will shrink when they roast, so don't get too knife happy.


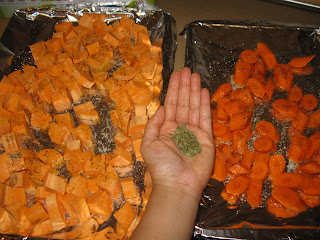
Line two sheet pans with aluminum foil for the sake of clean-up (my husband is always overjoyed to wash one less dish).  Season veggies with olive oil, salt, pepper and oregano.  Toss ingredients together and spread into one even layer (clean hands are the best tool).  Tip: the veggies will not caramelize if they're stacked on top of each other.


 Place veggies in the oven and roast for 40 minutes.  Halfway through, rotate the pans and give them a vigorous shake.


 While the veggies roast, bring a pot of water to a boil for the grits (per the label's directions).  

To prepare the swiss chard, cut off the rough ends.  Stack the leaves and roll it like a cigar (or something else... ahem!).  Begin to chop into 1" pieces and voila!  The knife skill that you just did is called a chiffonade (pronounced shif-ah-nod).  Wash and dry the greens to remove sand and dirt.  Repeat if needed.  A salad spinner simplifies this task.


Wash and (spin) dry the flat leaf parsley in the same manner.


Grate the cheese...

... and measure out the grits.  I acknowledge that quick-cooking grits is blasphemous to a born and raised Southerner.  I used this variety because it will cook in the same amount of time as the swiss chard and protein.  Feel free to substitute with "real" grits if your heart desires.


"No self-respecting Southerner uses instant grits.  I take pride in my grits."
 - Mr. Tipton from My Cousin Vinny.


In a large non-stick pan, warmed over medium/high heat, saute the onions.


Add the swiss chard and cook them until it looks like...


... this.  Remove from heat and set aside.


When the water comes to a boil, season with kosher salt and add the grits, stirring constantly.


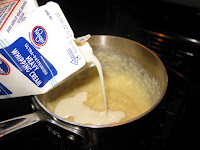
Add the cheese and heavy cream.  Cover and remove from the heat.  This would be a great time to start cooking your protein, if you so choose to serve and/or consume it.


This is what your veggies should look like after they're done roasting.


PLATING

You don't need to be a professional chef to plate like one.  Since we eat with our eyes first, you deserve to be presented with beautiful food.  I like to center then stack my ingredients.

Start off with a "pool" of grits as your base.


Pile the sauteed swiss chard, leaving some space along the perimeter.


Top with the roasted vegetables and garnish with the flat leaf parsley.  Vegetarians, rejoice!


This is what it looks like served with chicken.